Video guide how to sign you executable using AzureSignTool
This tutorial is for when you already have your Code Signing Certificate in Azure Key Vault and are ready to start signing. For a tutorial on how to generate a Code Signing Certificate and import it into Key Vault, view our other guide: Setup Verokey/DigiCert Code Signing on Microsoft Azure Key Vault
Step 1. Create Microsoft Entra ID Application in Azure
To access the Azure Key Vault Certificate from your computer or VM, we need to create a Secret Key to gain access permissions. This will be done via an Entra ID Application.
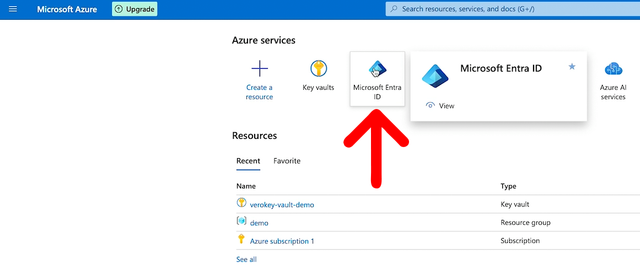
So login to your Azure dashboard and find the Microsoft Entra ID service, and click on it.
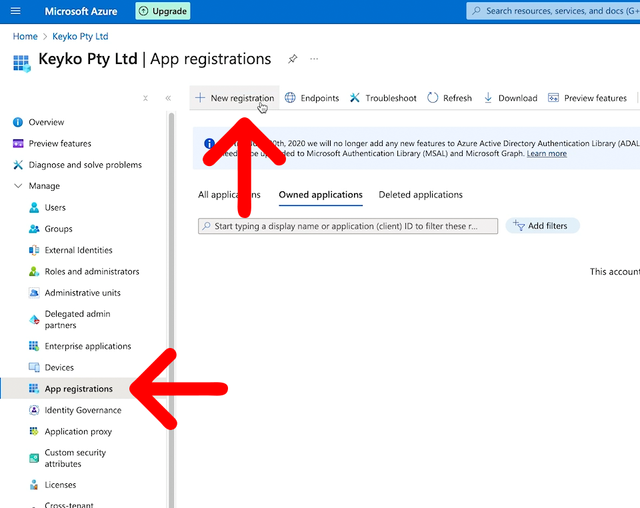
From the Entra ID page, click on App Registrations from the left main menu, then click the New Registration button.
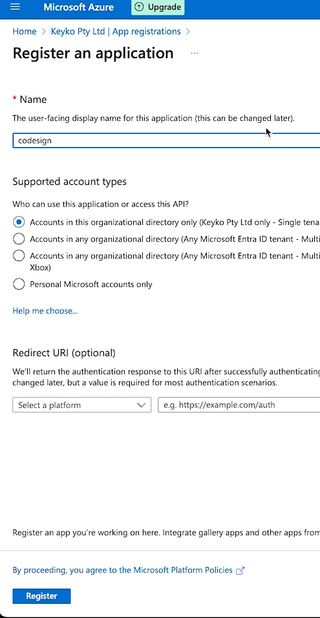
Fill out the app registration form to create your new application.
You will see the application page now. So let's keep this window open for later and move on to the next step.
Step 2. Download and Install AzureSignTool
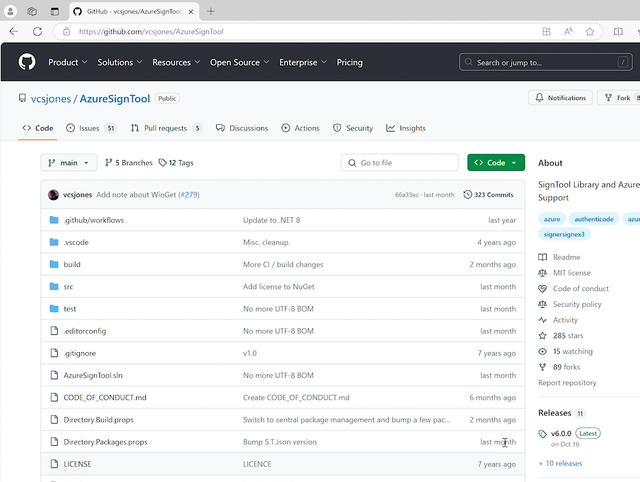
Go to the AzureSignTool GitHub page and download the tool:
https://github.com/vcsjones/AzureSignTool
The page will have instructions on downloading, compiling and installing it. Or you can download a pre-compiled package from the releases page: https://github.com/vcsjones/AzureSignTool/releases
Step 3. Launch Command Prompt and get command ready
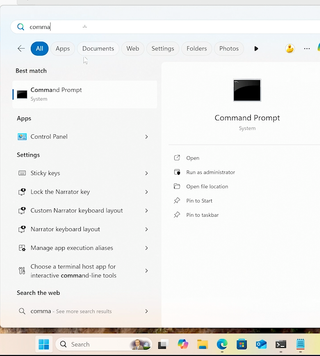
With the AzureSignTool downloaded, put the .exe application somewhere easy to access, such as your desktop. And then launch the Microsoft Command Prompt application via your Microsoft start menu.

I also recommend launching a text editor to write your command to use for signing, as it can be long and has many values we need to paste in. And when it is ready, we can copy and paste it into the command prompt to run

Below is the command we are going to use with the values we need but have not yet been entered:
shell
azuresigntool.exe sign \
-kvu "VAULT-URI" \
-kvc "CERTIFICATE-NAME" \
-kvi "APPLICATION-CLIENT-ID" \
-kvs "CLIENT-SECRET" \
--azure-key-vault-tenant-id "TENANT-ID" \
-tr http://timestamp.digicert.com \
-td sha256 “PATH-TO-SIGN”
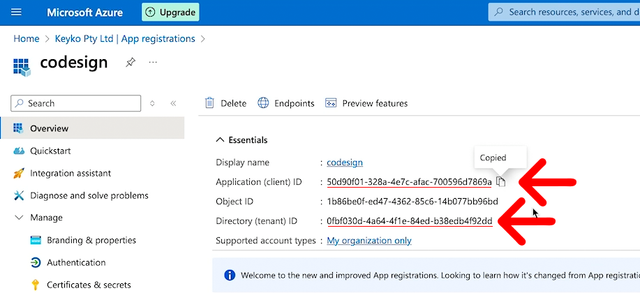
First, we will get our APPLICATION-CLIENT-ID and TENANT-ID.
So, if you go back to the application you created in Azure where from Step 1. You will see the Application (client) ID and the Directory (tenant) ID values. Copy and paste those into your command replacing the placeholders.
Now, you need to create a Client Secret for your application to paste into your command.
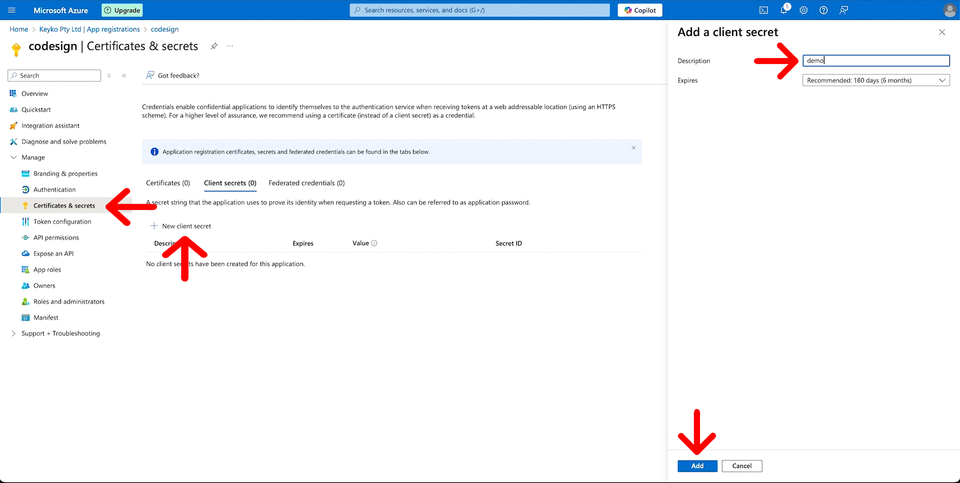
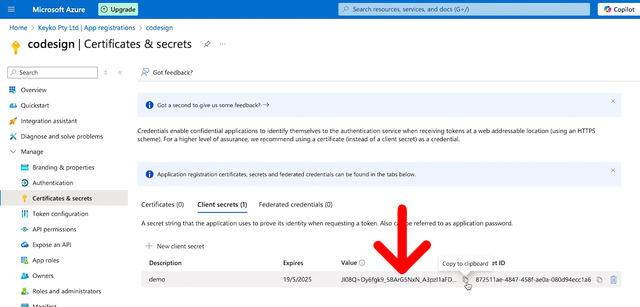
So, from the Application Azure portal you're still in, go to Certificates & Secrets in the left menu.
And then, click the New Client Secret button to open the side panel where you enter a name and click Add.
With the newly created secret, copy the value and paste it into your command, replacing the CLIENT-SECRET placeholder
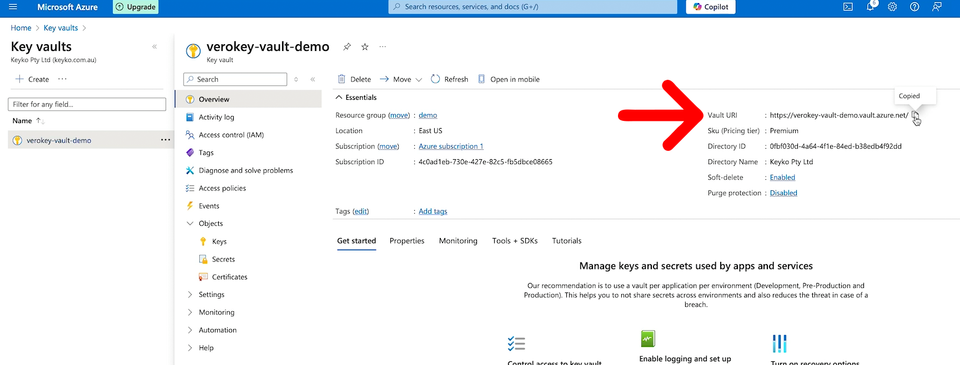
When that is done, go back to Azure and go to your Key Vault, which has the Certificate you will use for signing. On the Overview page of your Key Vault, you will find the Vault URI you need to copy and paste into your command, replacing the VAULT-URI placeholder.
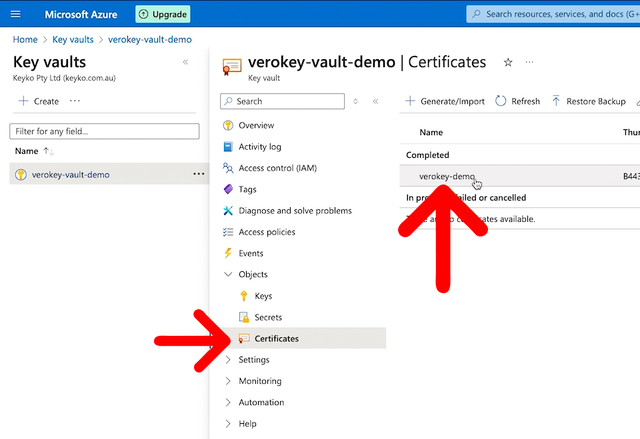
Still in your Key Vault, go to the Certificates from the left menu. Find your certificate name to copy and paste into your command to replace the CERTIFICATE-NAME placeholder.
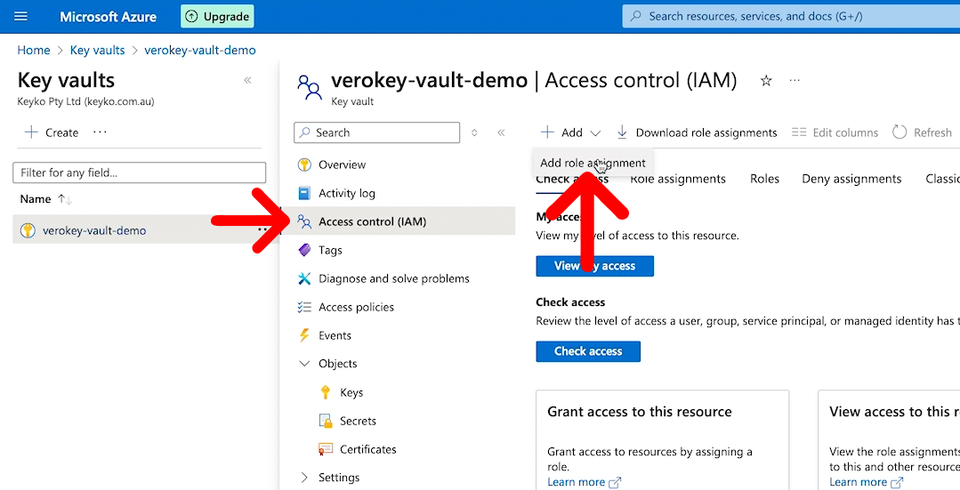
We need to give your application access now so it has permission to access the key vault and get the certificate to sign.
So go to the Access Control (IAM) from the left menu. Then, from the Add menu, click Add role assignment.
From the new Add Role assignment page, you will need to find a role that has cryptographic operation permissions to sign and certificate permissions to get. You should only limit the permission to what it needs to complete the signing, so I recommend you read through the permissions to see if any more are actually needed.

On the Members tab, click the select members link to open the side panel. Search for the application we had previously created from Step 1 and select it. When all is done, review + assign.
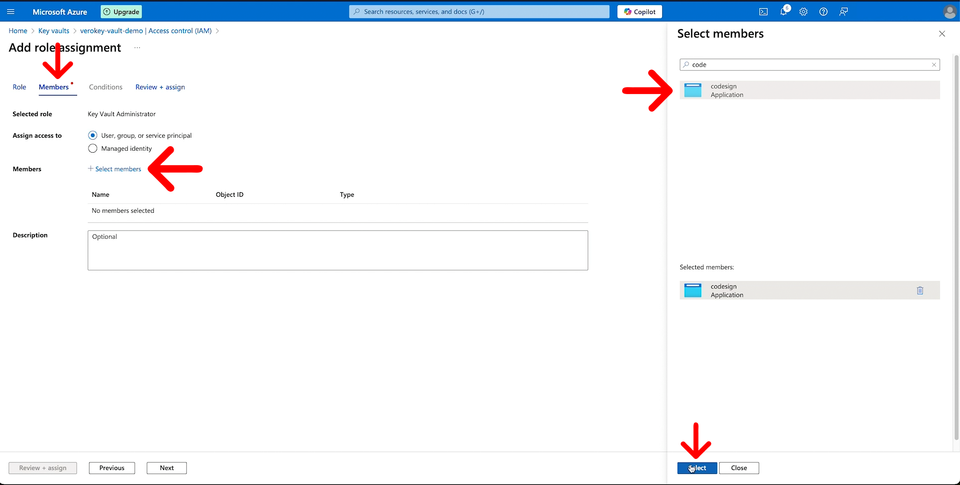
With the permissions assigned to the application, you are now ready to sign.
Step 4. Sign your application executable
The command is almost ready with all your values pasted in replacing the placeholders. The last one you need is the path to the executable. So replace the PATH-TO-SIGN placeholder with the exact path to what you want to sign. With the AzureSignTool.exe on my desktop and the executable I want to sign "My Executable.exe" my command looks like the following:
shell
C:\Users\paul\Desktop\AzureSignTool.exe sign \
-kvu "VAULT-URI" \
-kvc "CERTIFICATE-NAME" \
-kvi "APPLICATION-CLIENT-ID" \
-kvs "CLIENT-SECRET" \
--azure-key-vault-tenant-id "TENANT-ID" \
-tr http://timestamp.digicert.com \
-td sha256 "C:\Users\paul\Desktop\My Executable.exe"
Or as a single line:
shell
C:\Users\paul\Desktop\AzureSignTool.exe sign -kvu "VAULT-URI" -kvc "CERTIFICATE-NAME" -kvi "APPLICATION-CLIENT-ID" -kvs "CLIENT-SECRET" --azure-key-vault-tenant-id "TENANT-ID" -tr http://timestamp.digicert.com -td sha256 "C:\Users\paul\Desktop\My Executable.exe"
Because we are signing with a Verokey or DigiCert Code Signing Certificate, we are using the Digicert timestamp server.
So, with your command ready, copy and paste it into your Command Prompt and press Enter to execute it. You should see an out put similar to the following:
shell
info: AzureSignTool.SignCommand [0]
      → File: C:\Users \paul Desktop \My Executable.exe
      Signing file.
info: AzureSignTool.SignCommand[o]
      => File: C:\Users\paul\Desktop\My Executable.exe
      Signing completed successfully.
info: AzureSignTool.SignComfand[o]
      Successful operations: 1
info: AzureSignTool.SignCommand [0]
      Failed operations: 0
If you right-click the executable you signed and then go to Properties in the menu, you will see a tab: Digital Signatures; go to this tab to see if your new signature is there.
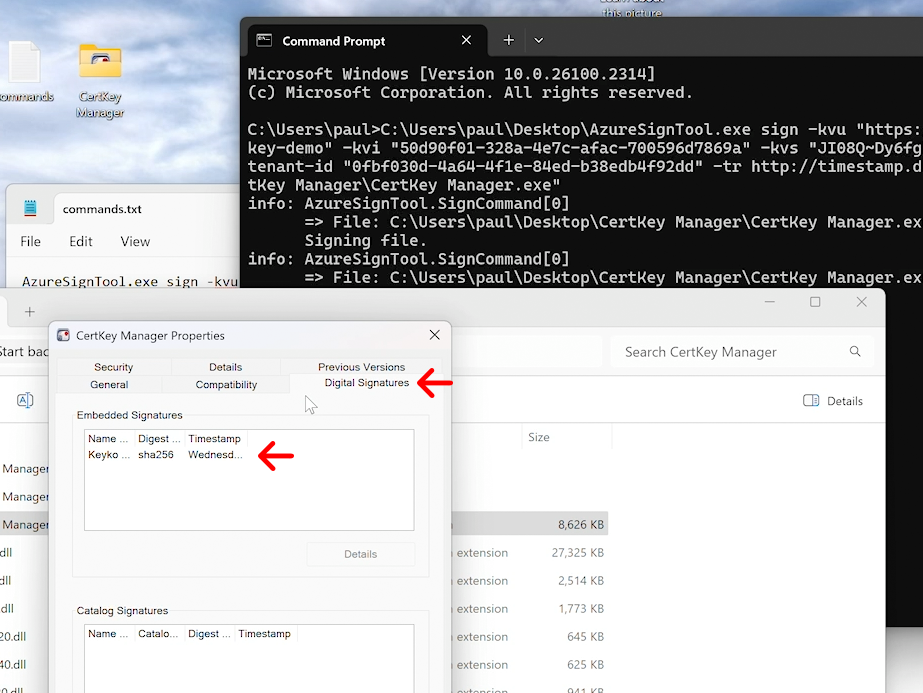
Your executable/application is now signed and ready to be distributed.
Discussions and Comments
Click here to view and join in on any discussions and comments on this article.


