
Step 1. Purchase your SMIME Email Certificate
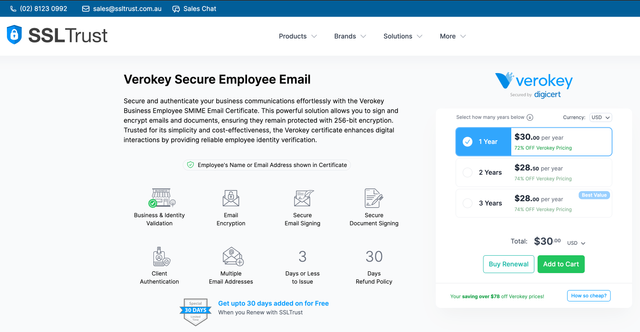
You will need to purchase a trusted SMIME Email Certificate from a trusted certificate authority. We have a variety of them available here at SSLTrust, which you can see here on our SMIME Certificates page.
Step 2. Configure your SMIME Certificate
After you have selected the SMIME Certificate you want, with all the features you require, complete the purchase and then find the service within your SSLTrust account to manage.
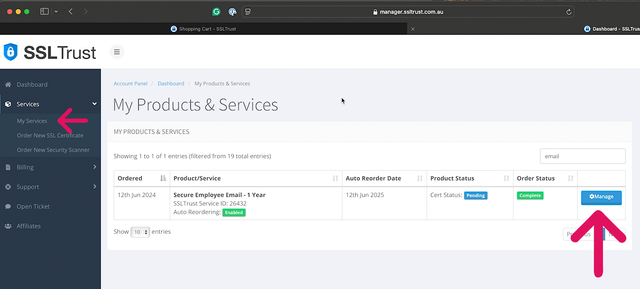
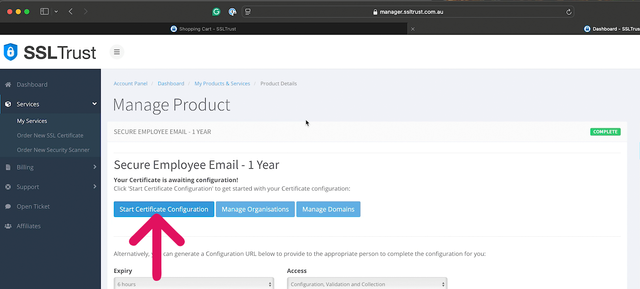
Click the start configuration button to be taken to the Verokey or DIgiCert configuration page.
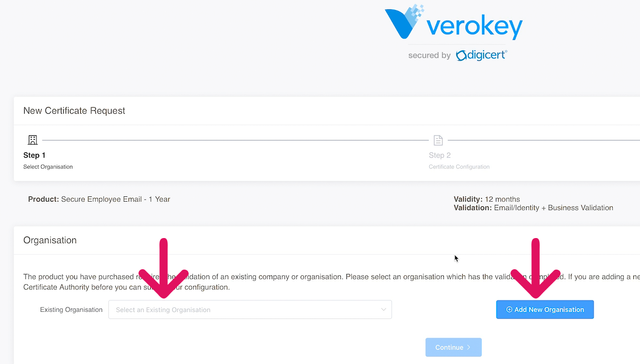
If you have an organisation-validated SMIME certificate, You will need to enter your organisation details via the Add New Organisation button or select one already in your account if you have one. If you have ordered just an email validation certificate, you won't see these options.
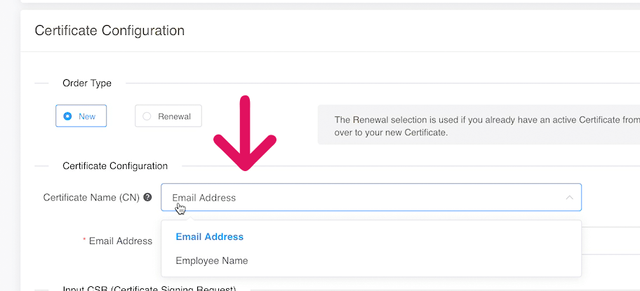
With the organisation selected ( if you're doing an organisation SMIME ), you can move on to the certificate configuration. First, you need to select what you want shown in the Certificate Common Name. This will be shown to people who receive your emails, and the selection here will depend on the product you have ordered.
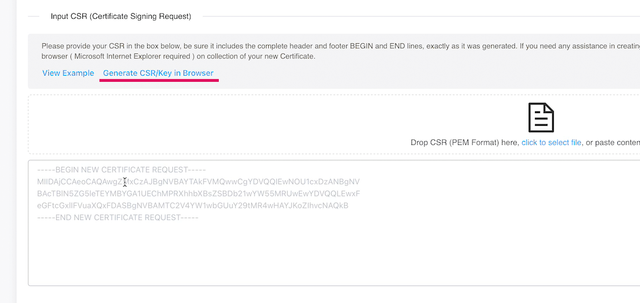
Now, you need to provide a CSR. You can generate one on your system, or you can use the CSR/Key Generator provided in the configuration panel by clicking the Generate CSR/Key in Browser link. You must make sure you save and keep the private key safe, as you will need it later, and your certificate won't work without it.
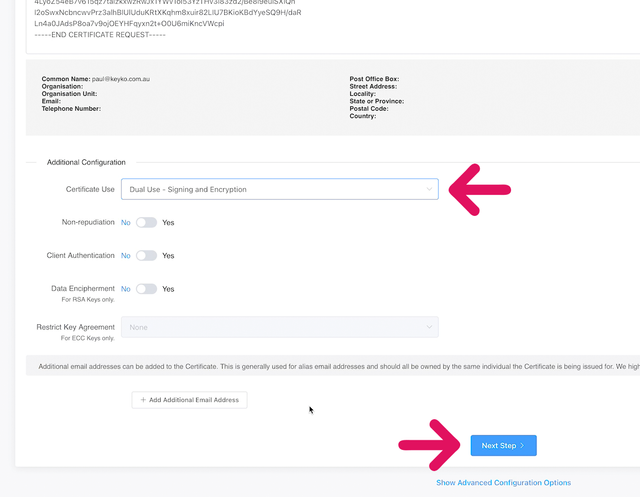
With your CSR entered, continue onto the additional configuration options. Here, you will have a few different options depending on which certificate you have purchased. You can make selections such as only allowing signing or encryption with your Certificate or both.
You may also have the option to add additional email addresses. For the Certificate to work with any specific email address you want to use it with, you must have the email address added in.
When you have made all your required selections, click Next to continue.
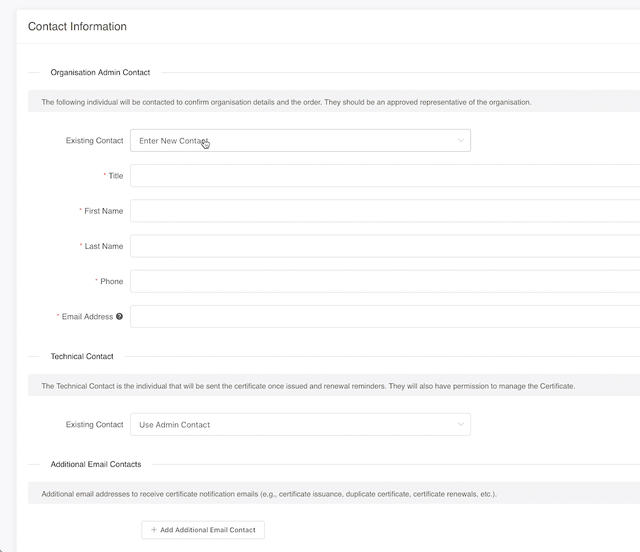
The final step will require you to enter contact details of your organisation and any technical contacts you want added.
When all is done, click Submit Configuration.
Organisation & Email Verification
If you have ordered an organisation-validated SMIME Certificate, the organisation's details and contacts will need to be verified by the DigiCert validation team. This can take 1-5 business details and can depend on how well-listed your organisation is online. Be sure to keep an eye out for any emails from them and a verification phone call. If you don't hear from them within 2 business days, please reach out to our support team, and we will check on the status and provide you with updates.
You will also receive emails to approve the domain name being used and/or to verify your email address. Follow the instructions within the emails to approve them for use.
Step 3. Generate PFX File
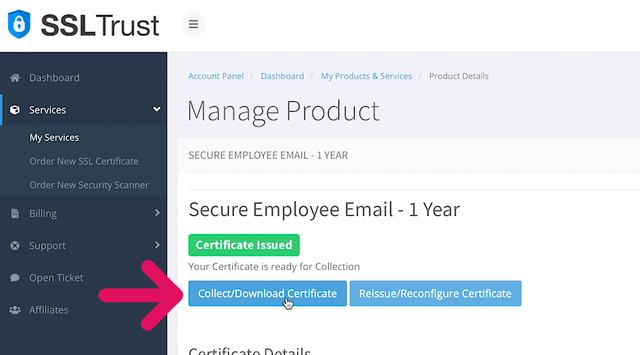
When your validations are all completed, your certificate will be issued. You will see the new Collect/Download Certificate button under the service in your SSLTrust account. Click the button to be taken to the collection page.
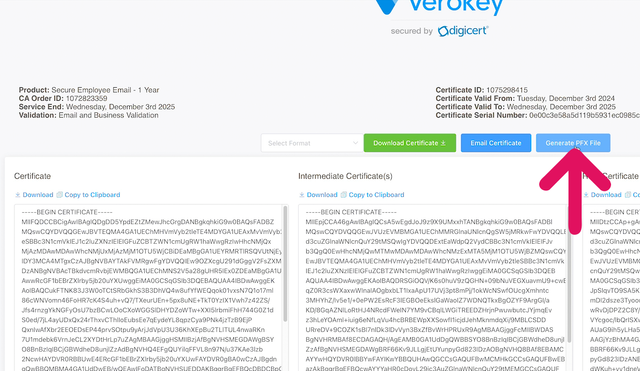
On the collection page, you will see your newly issued certificate and the intermediate certificates. You will also see the button; Generate PFX File, click this.
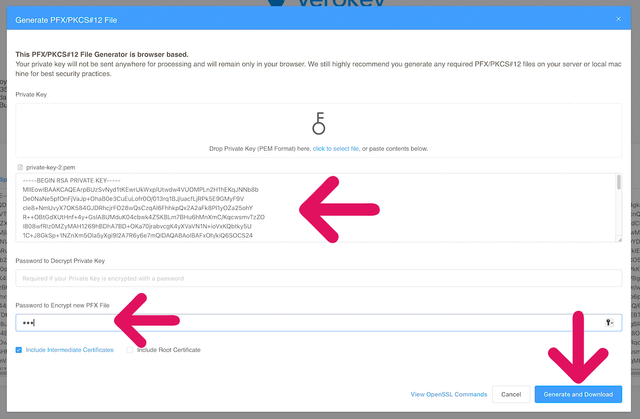
Now, you need to paste in your private key that you previously created during the configuration. We also recommend you enter a password to encrypt your new PFX file, as iOS always asks for one when installing your certificate. When done, click generate and download.
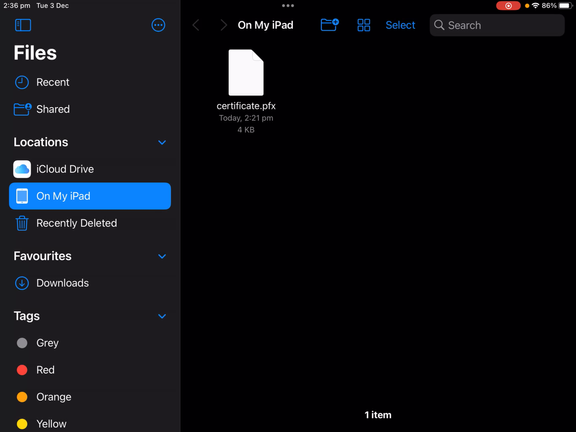
You need to send your new PFX file to your iOS device. You can send it via AirDrop, your iCloud shared storage, or email it to yourself as an attachment.
Step 4. Install your new SMIME Email Certificate onto iOS
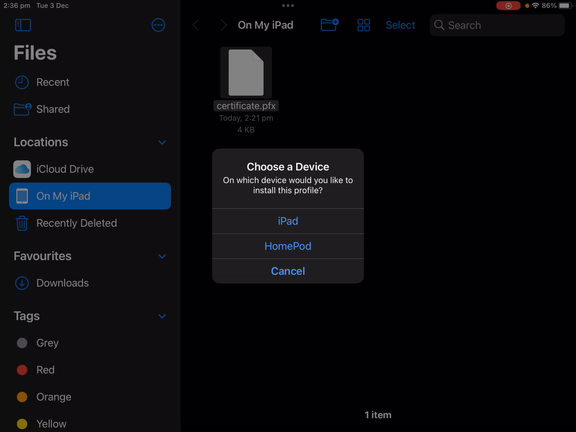
I have sent it to my iCloud Drive and downloaded it, but sometimes emailing it to yourself is easier. So when you have your PFX file ready, click to install. It may ask you if you want to install it as a Profile or which device. When the installation is done, it will say Profile Downloaded or something similar.
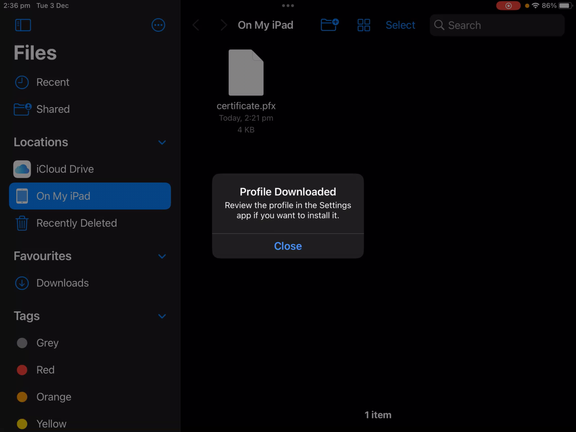
Now go to your iOS Settings, and you will see a new menu item; Profile Downloaded. Click this new menu item.
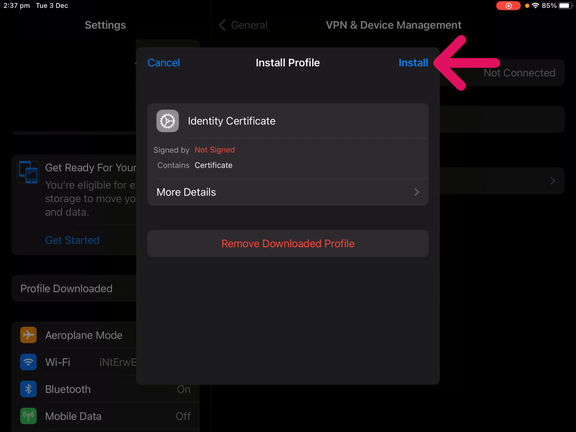
You will be presented with a screen similar to the one below. It may say in red Not SIgned, which is okay, and you can ignore it for now. Click the Install button and continue through the prompts to enter your iOS passcode and then your PFX encryption password.
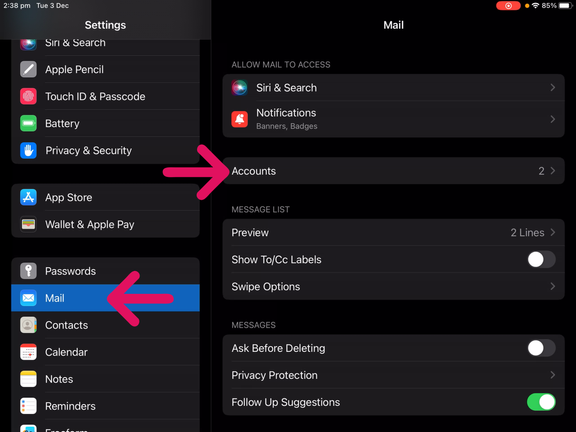
With the profile now installed, go to your Mail app settings from the left menu. Then click the Accounts setting menu, and select the account with which you want to use the new SMIME Certificate.
With your account selected and the panel open, click the Account again to show further options. Then click Advanced Settings.


You will now see some menu items to Sign and Encrypt by Default under the S/MIME sections.
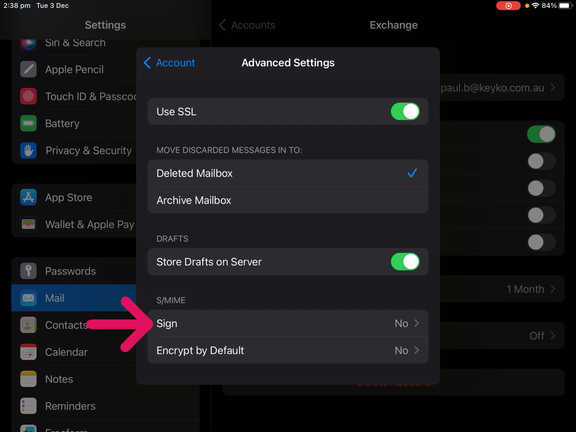
Click on each option and then enable it. You will also see your certificate there, and you can click the Info icon to see details about it, which will also show that it is trusted. If it is showing as not trusted, this may be because you have not included the intermediate certificates in your PFX file.
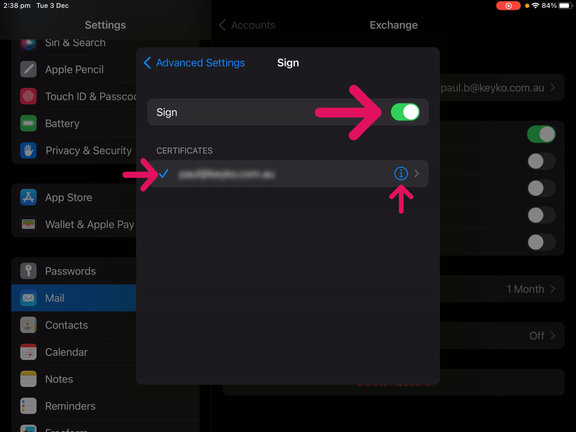
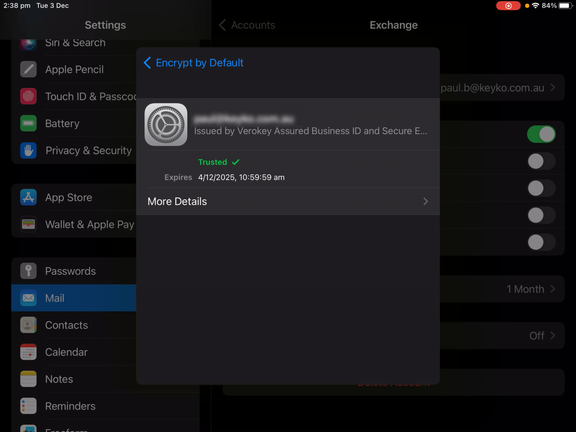
With those options enabled, close the account panels and apply the setting changes.
You are now ready to Sign and Encrypt your emails from the iOS Mail app. You can launch the Mail app and test sending an email to someone to see how it shows it as signed by yourself.
Discussions and Comments
Click here to view and join in on any discussions and comments on this article.

